Painting Lesson
The Road to Brown's Town
A landscape painting lesson in oil and acrylic — capturing the atmosphere of rural Jamaica through memory, photo reference, and imagination.
A landscape painting lesson in oil and acrylic — capturing the atmosphere of rural Jamaica through memory, photo reference, and imagination.
These two paintings are views along the road from St. Ann to Brown's Town in Jamaica. Painting them brought back a flood of good memories — the heat, the green, the sound of footsteps on the road. That personal connection is what lifts a painting beyond a copy of a photograph.
Both works were painted from photo references, but the photographs were used as a guide, not a script. A photo gives you information; your imagination gives you the painting. Your job as the artist is to select, simplify, and re-interpret what you see — not to reproduce every leaf and shadow the camera captured.
This lesson walks you through the approach used to create these paintings, from the very first wash on the canvas to the final details.
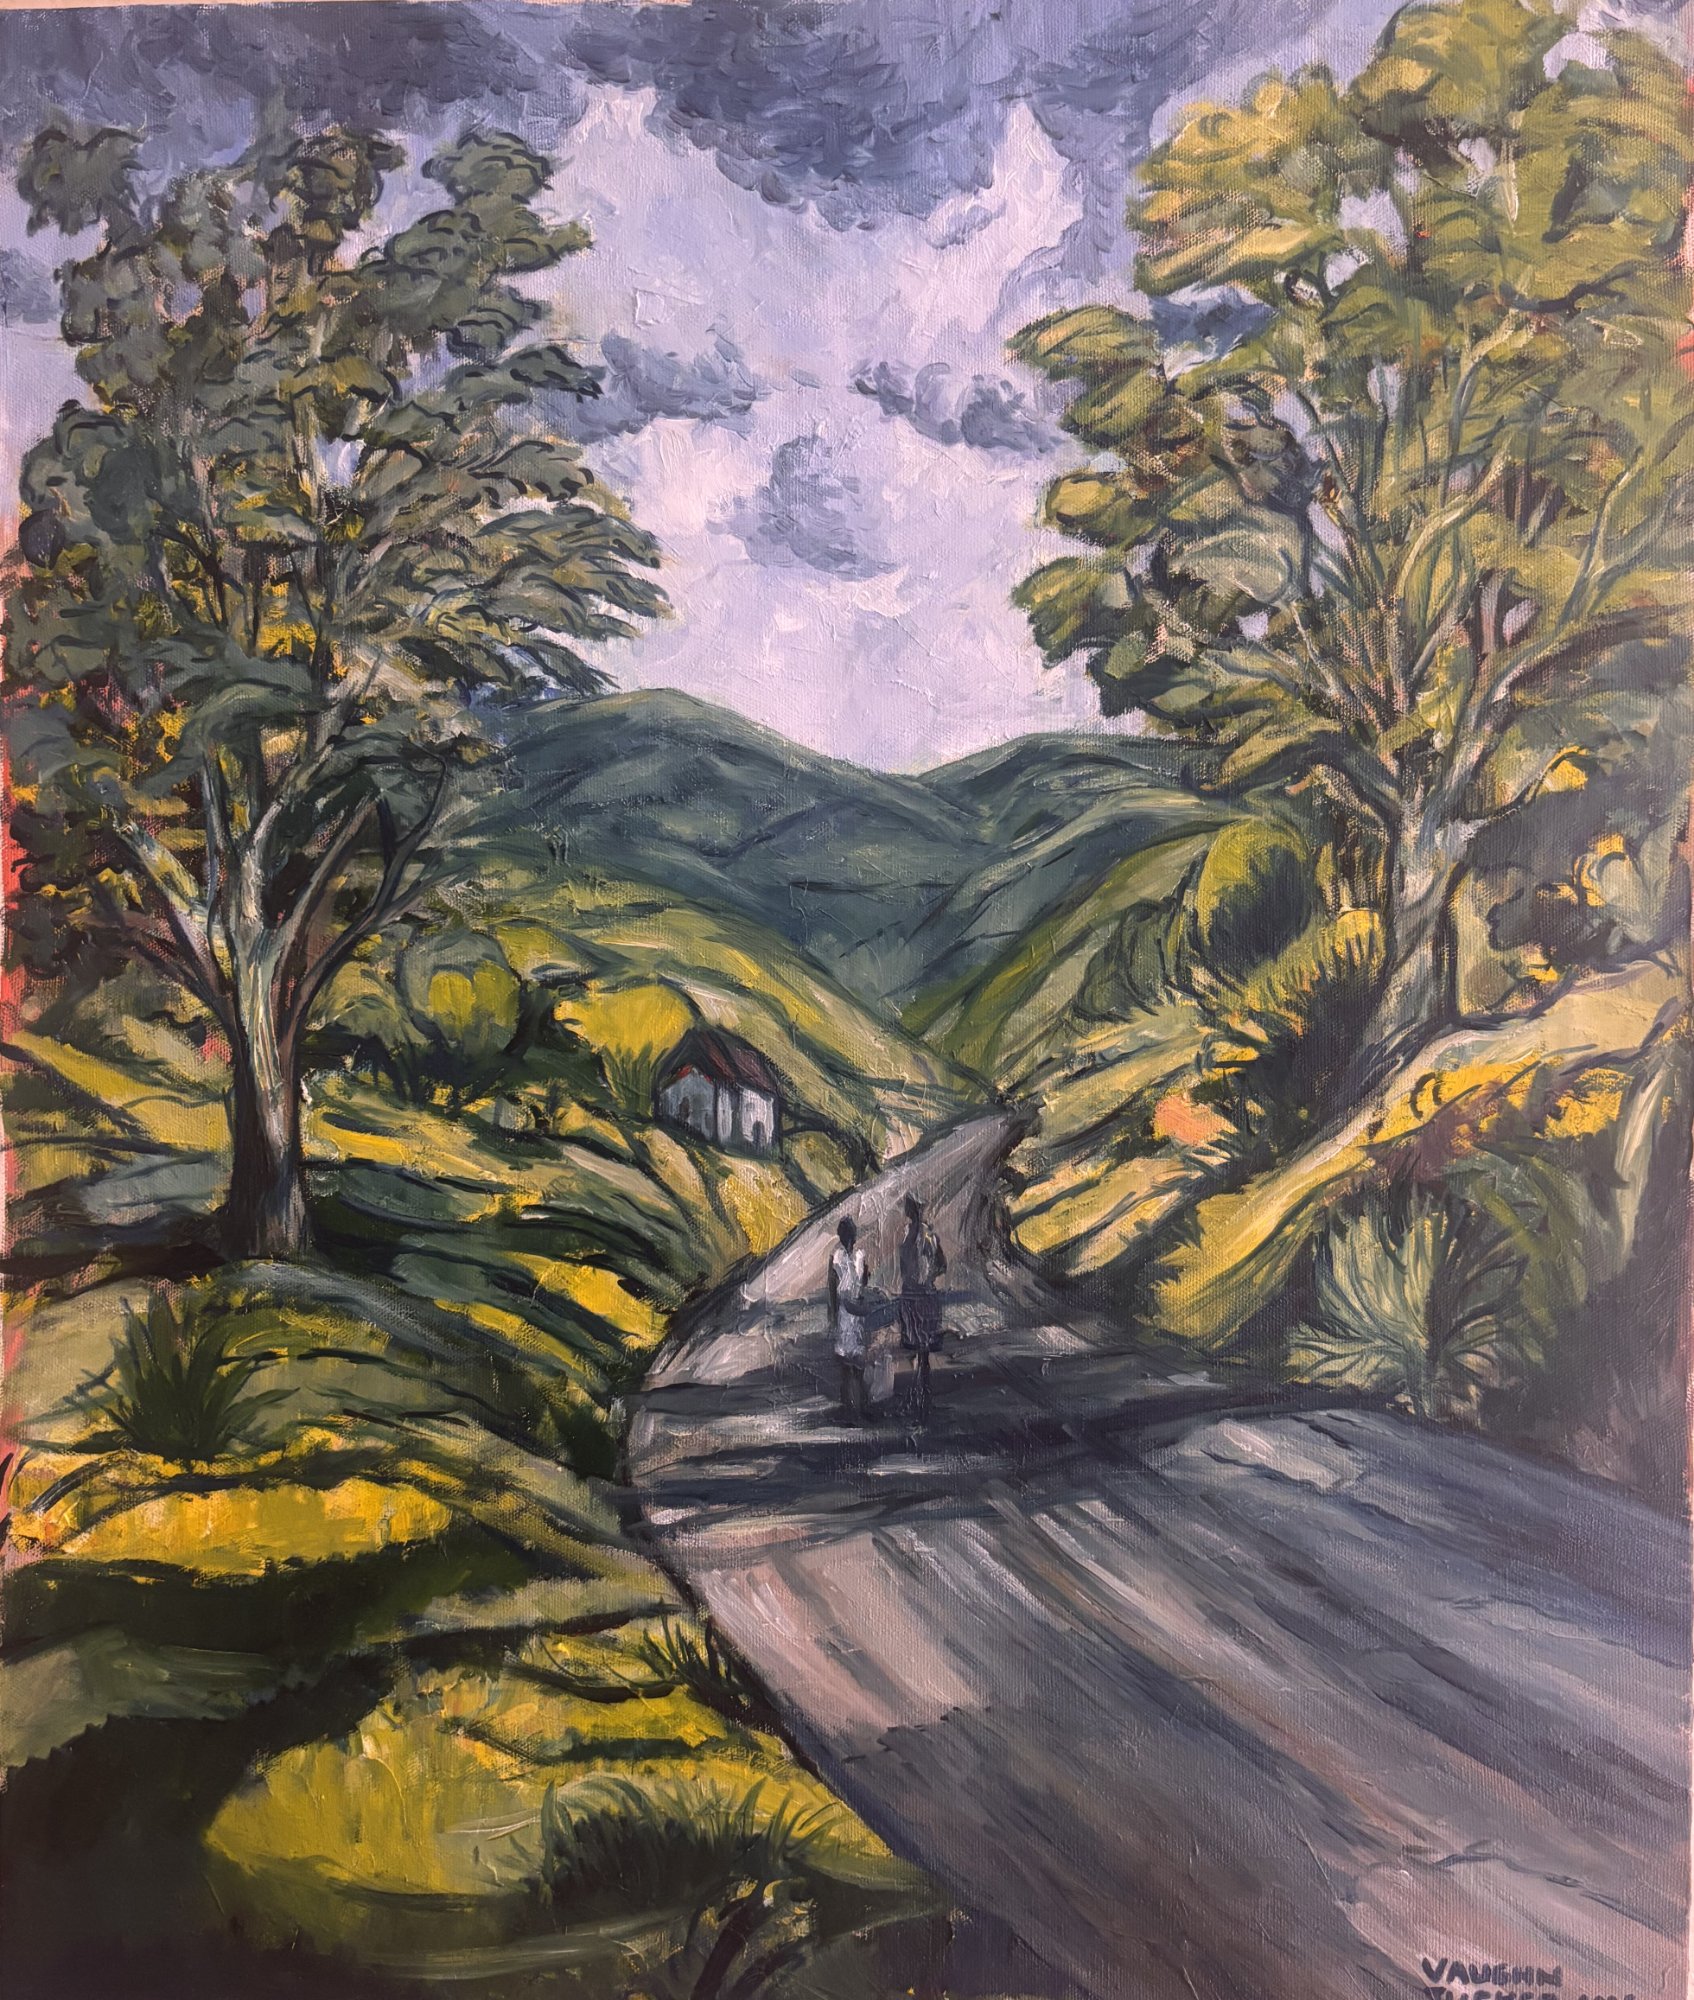
This painting captures the winding road from St. Ann heading toward Brown's Town — a view that carries deep personal meaning. The composition draws the eye along the road, past the walking figures, and into the green hills beyond. It's a painting about journey and memory as much as it is about landscape.
Atmosphere first. The sky was established early with loose washes of grey and blue, creating the heavy tropical air that hangs over the hills. Notice how the distant mountains dissolve softly into the sky — that's aerial perspective at work.
Bold, directional brushwork. The vegetation is painted with confident strokes that follow the natural direction of the foliage. The sunlit yellow-greens contrast sharply against the deep shadow greens, giving the landscape its energy and light.
The figures tell the story. The small figures on the road are painted with just a few simple strokes — loose enough to feel natural, precise enough to give the scene its human scale and narrative.
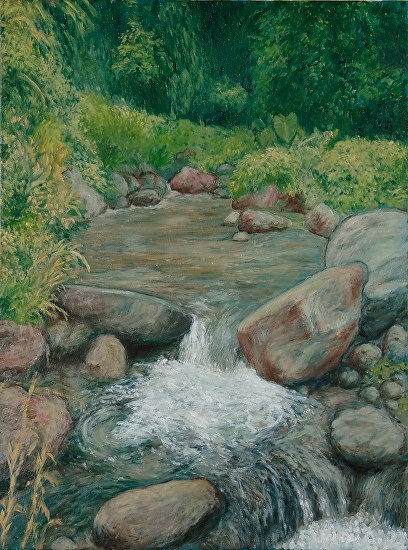
A completely different challenge from the road scene — here the subject is water, stone, and the interplay of movement and stillness. The river bed at Clarendon is a study in texture and light, where the eye is pulled down through the cascading water and into the cool greens beyond.
Handling water. The white water tumbling over the rocks is the focal point — achieved not by painting every splash, but by leaving confident strokes of thick white and off-white paint to suggest the foam and motion. The calmer water upstream uses softer, blended tones of grey-green and blue to contrast against the energy of the falls.
Rock form and weight. Each boulder has been given real mass through careful value shifts — warm pinks and browns on the sunlit faces, cooler grey-purples in shadow. The rocks feel solid and heavy, anchoring the composition while the water moves around them.
Depth through greens. The vegetation moves from warm, detailed grasses in the foreground through to a deep, rich wall of green in the background. This layering — light and warm in front, dark and cool behind — creates a strong sense of depth and encloses the scene like a natural amphitheatre.
Before touching any oil paint, lightly wash the entire canvas with thin blue acrylic paint. This does two things: it removes the intimidating white of a blank canvas, and — perhaps more importantly — it helps the oil paints grip and flow better on the surface. The blue undertone also creates a unifying coolness beneath the landscape that ties the whole painting together.
This is the most important stage and it should come right at the beginning. Atmosphere is the mood or feeling you want the painting to have — the warmth of the afternoon, the haze over distant hills, the weight of tropical air. You create it with broad, loose washes of greys, blues, and whites. At this stage, you are not painting things — you are painting a feeling.
Don't worry about details at all. Use large brushes and move quickly. Let the colours blend loosely on the canvas. Stand back often and ask yourself: does this feel like a hot Jamaican road? Does the air look heavy? That's what you're after.
Now begin to separate the sky from the hills, the hills from the road, and the road from the vegetation. Use mid-tones — not your lightest lights or your darkest darks yet. Think of this stage as a colour map. Each area gets its approximate colour and value, but the edges stay soft and the shapes stay loose.
The road should cut through the composition and draw the eye inward. The hills in the background should be cooler and lighter than the foreground vegetation — this is called aerial perspective, and it's how nature tells us what's far away.
Here is where many beginners go wrong: they try to copy everything in the photograph. A camera captures everything equally — every leaf, every crack in the road, every cloud. But a painting should be selective. You decide what matters. You might simplify a complex tree into a bold silhouette. You might deepen a shadow that was barely there in the photo because it makes the composition stronger.
Let the photo give you information about colour, proportion, and light — but let your memory and imagination make the decisions about what goes in and what stays out.
The lush greens of Jamaica are one of the most expressive parts of this scene. Work from dark to light — lay down deep greens first, then build up the lighter, sun-touched greens on top. Use a variety of greens: warm yellow-greens where the sun hits, cool blue-greens in shadow, and dark olive tones in the deepest shade.
Let your brushstrokes follow the direction of the foliage. Bold, directional strokes give energy and life. Avoid blending everything smooth — the texture of the paint itself becomes part of the visual experience.
The figures walking along the road are small but essential — they give the painting scale and story. Keep them simple. A few strokes of the right tone and value is all they need. If you overwork them, they'll look pasted on. If you keep them loose, they'll feel like they belong in the scene.
Add your final details: highlights on the road where light reflects, a warm glow on a distant rooftop, the dark trunks of the largest trees. Step back frequently. Know when to stop — the atmosphere you created in Step 2 is the soul of this painting, and overworking the details can kill it.